My Coleman® Camping Stove
|
|
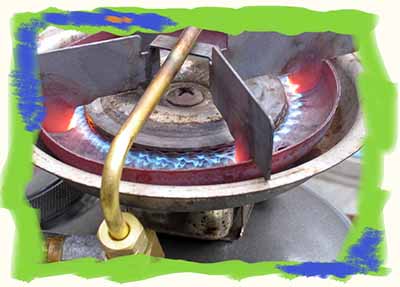
On the whole my Coleman® petrol burning stove does a very
good job, and in the most part is reliable. It runs on Coleman®
Fuel or unleaded petrol, which the later is readily available in
most areas and is relatively cheap.
When in use the stove boils water very quickly indeed
(10,500 BTU's claimed). But is less good when it comes to
cooking food that requires anything other than 'full throttle'
such as frying sausages or bacon. Most campers I know like
nothing more than a really good fry-up, including me. It is true
to say you can turn the heat down. However after a little time
the flame begins to burn rich. Turning from a blue/green colour
to yellow, leaving a deposit of soot on the base of the pan.
Maybe incorporating some sort of adjustable diffuser would be a
better way to control the amount of heat delivered to the pan,
rather than restricting the flow of the fuel - a project for
later perhaps. |
|
|
|
Having paid quite a sum on the initial purchase of the
stove, one would hope to slowly recover some finance from using
'cheap' fuel. When compared with the alternatives, such as calor
gas or methylated spirits.
However, I have now got my second blocked 'generator'. Not
bad you might say as I've now had my stove for twelve years and
use it regularly. But I've had a 'Camping Gaz' stove for well
over thirty years and all I've replaced is the disposable gas
cylinders. So it doesn't compare well. But for some reason,
beyond me, I continue to be fascinated by petrol/paraffin
burning stoves. Bizarre really. |
|
|
|
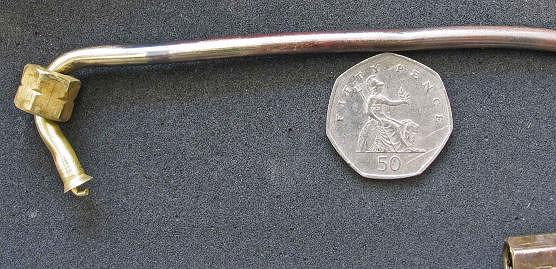
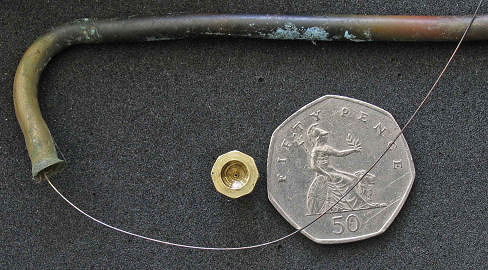
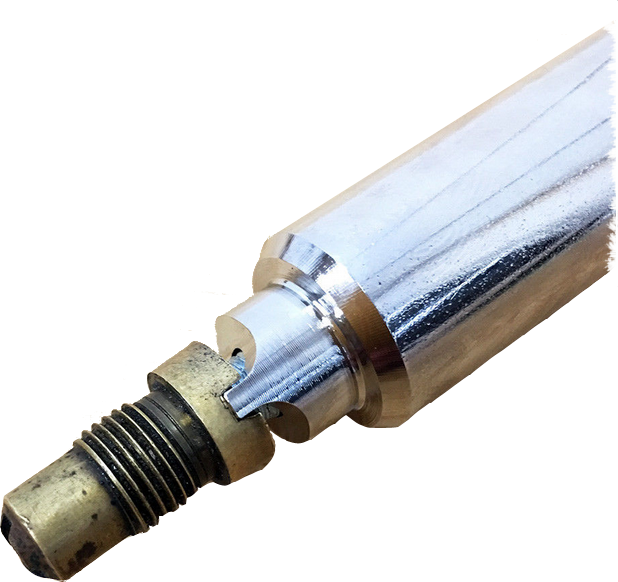
The generator is what they call the brass tube that runs
across the top of the stove, in the flame. It in fact carry's
the pressurised fuel from the fuel tank to the burner. As the
fuel passes along the tube and through the flame it is heated
and vaporised. It does not burn inside the tube as there is no
oxygen present. The vapour is released underneath the burner,
then travels up through the burner rings before being ignited.
|
|
|
|
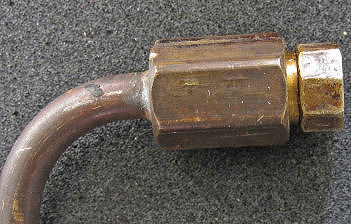
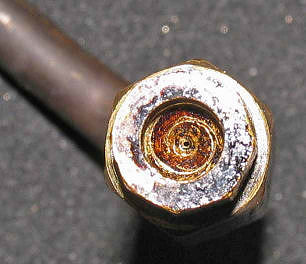
| Here is a close-up of one end of the generator, the 'L'
shaped piece of brass clips into a hole in the on/off valve
assembly. As the stove is turned from the 'off' to the 'on'
position, it moves the stainless-steel wire about 1/4" along the
smaller micro-bore brass tube which is within the larger brass
tube you can see here. This appears to have the effect of
keeping the jet at the other end of the generator clear of
carbon deposits. |
|
|
|
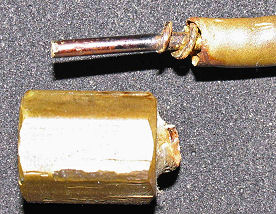
| The micro-bore tube can be seen here with the
stainless-steel wire entering it. |
|
|
|
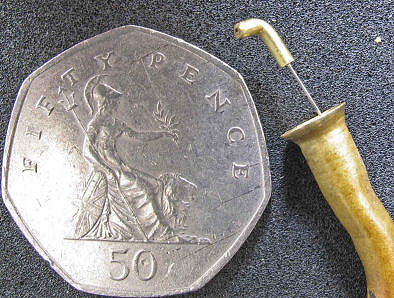
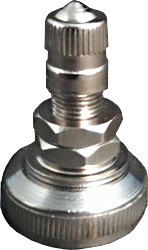
| And at the other end, the removable jet. I guess you could
have several of these in different sizes for using different
fuels ;) although the newer generators seem to have a
non-removable, one piece assembly. Which also makes cleaning all
the more difficult. |
|
|
|
| With the jet removed, the stainless-steel wire can be seen
protruding from the micro-bore, which is located in the centre
of the outer tube. Aligning it with the jet. When I removed the
jet there was a black
tar like residue
deposit in this area, as can be seen below
the threads. Perhaps a yearly strip and clean in the way
of maintenance
is the way to go. |
|
|
|
| A cleaned jet and the stainless-steel wire |
|
|
|
In between the two brass tubes is, what can best be
described as a spring. A spiral of solid wire running from end
to end. Not dissimilar to a bending spring. As I suspect that
these units are made from straight tubing, and the last part of
the manufacturing process is to bend them into the desired
shape. This would help to prevent the tubes kinking as well as
keeping the micro-bore in the centre of the outer tube.
|
|
|
|
Spare parts list for the 533-700J dual fuel stove (first production 1/91)
Old part No. - Description - New part No.
- 220C1401 Filler cap 201019
- 220A6201 Pump repair kit 201030
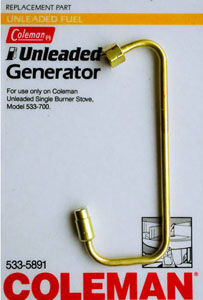
- 533-5891[442-5891] Unleaded Generator 201066
- 508A5571 Valve assembly 201250
- 400-3451 Burner ring set 201239
- 425A3451[413C3021] Burner assembly 201462
- 400-5401 Grate assembly 201259
- 533-6151 Font/Tank
- 639-1091 Pump cup and clip 201070
- 400-5261 Burner box assembly 201257
- 400A1261 Generator bracket
- 400-0601 Screws, 6 per pack
- 200-6381 Check valve and air stem 201029 [1/4" x 32 ME Thread]
- 530A5071 Pump clip
- 508-7631 Carry case
|
|
|
|
|
|
|
Spare parts list for the 533-700E dual fuel stove (first production 2/92)
Part No. - Description
- R533-615E Font/Tank
- 220C1401 Filler cap
- 508-5551 Valve assembly
- 413C3021 Burner Bowl
- 400-3451 Burner ring set
- 639-1091 Pump Clip and Retainer
- 200A6201 Pump Plunger
- 200-6381 Air Stem and Check Valve [1/4" x 32 ME Thread]
- 400-5261 Burner box assembly
- 400-0601 Screws, 6 per pack
- 400A1261 Generator Bracket
- 400-5401 Grate
- 533-5891 Generator Assembly
- 508-7631 Carry case
|
|
|
|
|
So it now looks like I have no choice but to purchase a new one
now. About ten years ago I bought a generator via a local
outdoor shop. It then cost me around £10.00 I've recently
searched the web for a supply here in the UK, the best price I
could find was £12.95+carriage but they had nil stock. So I
searched again, this time world wide. Found a place in the USA
(via Amazon.com) that was selling them for $7.49ea (£3.71ea) so
I ordered two, had them shipped to a friend of a friend in the
USA who in turn send them onto me, as the company won't ship
outside the USA
$14.98 goods
$9.98 shipping and handling
$4.20 onward shipping
$29.16 Total (£14.45 (£7.23ea) at the time of transaction.
Sept 06)
It only took ten days from ordering to receiving the goods, and
what's more the shop here in the UK still has nil stocks.
Is this yet another case of 'rip-off Britain'? lets not go
there, today ;)
|
The stoves been running trouble
free for about 10 years now, until today. I'm going away
camping shortly so I thought I'd give the old girl a
test run beforehand. Good job I did. I couldn't
pressurise the tank, I checked there was fuel in the
tank, checked the fuel cap was secure, the on/off tap
was closed, yep all good. Pumping the plunger had no
effect even with it in the locked off position. So I
removed the plunger from the tank body for inspection.
It looked alright and was lubricated. I added a little
more oil and tried again, no joy. So I tried to open out
the neoprene cup slightly by hand, then quickly
re-inserted and pumped away. This time it pressurised
the tank instantly and I was able to light it for a test
burn. The burn was good but the pump again failed to add
more pressure to the tank without me taking it out and
splaying the neoprene cup out to form a seal with the
pump chamber walls. If the cup was the older leather
type an overnight soak in light oil might have been all
that was required to restore it. But mine is the newer
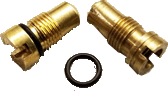
neoprene material and must be replaced. Coleman do a
replacement washer and cup [9 in spares list]
for the older leather type but for the neoprene type
they sell a kit that consists of plunger, plastic
locating ring, cup and washer [2 in spares list].
Also included in the kit are parts for older
stoves/lanterns.
|
|
|
|
| |
|
;)


;)
;)
;)
;)
;)
;)
;)